Many people still use normal password-based logins and many come back to:
There were 3029 failed login attempts since the last successful login
There are methods such as
Fail2Ban that help prevent any brute force attacks like so or you can use tools like
Endlessh to trap people in by using another port for ssh.
Generating an ssh key
Firstly, you would need your ssh key. This can be done by executing
Step 1
ssh-keygen
In a program such as PowerShell or cmd.
The 1st message that pops up wants to ask where to save the file. Pressing enter will leave it default.
You might be promoted with Overwrite (y/n)? This will appear if you previously made an ssh key before but if you no longer require it you can overwrite it. If you still need it you may consider making a /.ssh2/id_rsa instead.
Next, it wants to ask for a passphrase, this is a password for the ssh key. It should be memorable enough that you can remember it. You will not be able to see this due to it protecting your password from prying eyes. Once typed in press enter.
Now retype the password and press enter.
You will get an output similar to:
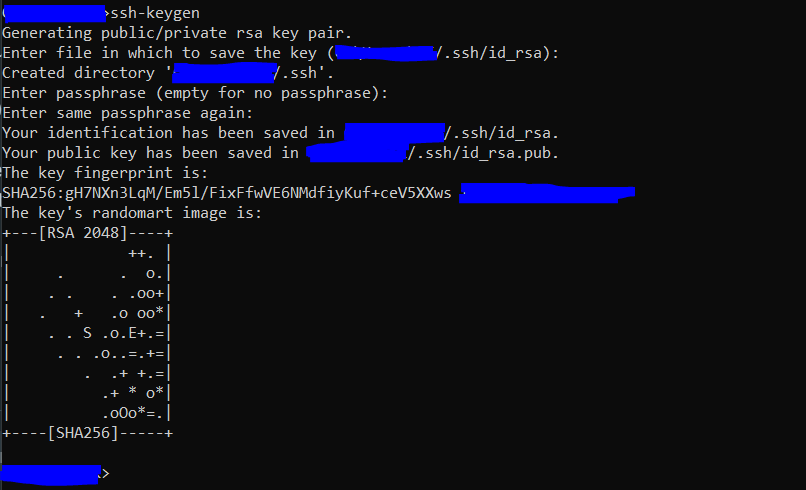
Now you should find it in the folder that you set such as /.ssh/id_rsa.
Uploading the public ssh key to the server
If you are using a system that supports ssh_copy_id you can use it
Step 2
ssh-copy-id user@ip
However, if you don't you can use the manual copy and paste method. You need to go to the folder you saved it to and access the id_rsa.pub file with some sort of text editor such as Notepad++.
You should get an output like so:
ssh-rsa AAAAB3NzaC1yc2EAAAADAQABAAABAQC915VweyT4KQ1j+jiEtUikW6AesLJW+c2kWf7q/ta1y2eGkALkZ5mGRpPTfYHzzYlNAWP41YYYgiALTgVnmD8iXxbMcjW1OLWM4ktzpBlxpPtNm0F66jvwqv/r6elaa9NATiyhlqxJ9p/JIEQ69rpWNMmOneMdESCDkVZmyxMleO/dVcOAqD1yALZyATZEdZ6bHnhe2Bnj+mzGCJLSNFcR+XeiK5GBeHiRRHCJu5fFH0dsDUTKZWH0oNkrc1UiREeVM343ZZdCRkJiJ5SKKL1BM3BkAmB0YEcWbQQYmQPdVusRBBUb1lgl1dPy+uEu5bEa5hGhTXAQlsRRoKNlVnT5 user@device
You need to ssh into your server, if you haven't done so already you can follow this
article.
Next, you want to ensure you have an ssh folder/directory on the server this can be done by executing the following command.
Step 2a
mkdir -p ~/.ssh
Once you have done so you want to copy the id_rsa.pub contents to substitute ssh_output in the following command:
Step 2b
echo ssh_output >> ~/.ssh/authorized_keys
Once done you will not get any feedback on success or failure. You might need to set:
Step 2c
chmod -R go= ~/.ssh
Make sure you don't change the permissions of the /root/ folder or the ssh folder. Setting this wrong will disallow you to access your server using ssh keys and will require a password instead, which you may have disabled.
Applying the private ssh key to an ssh client
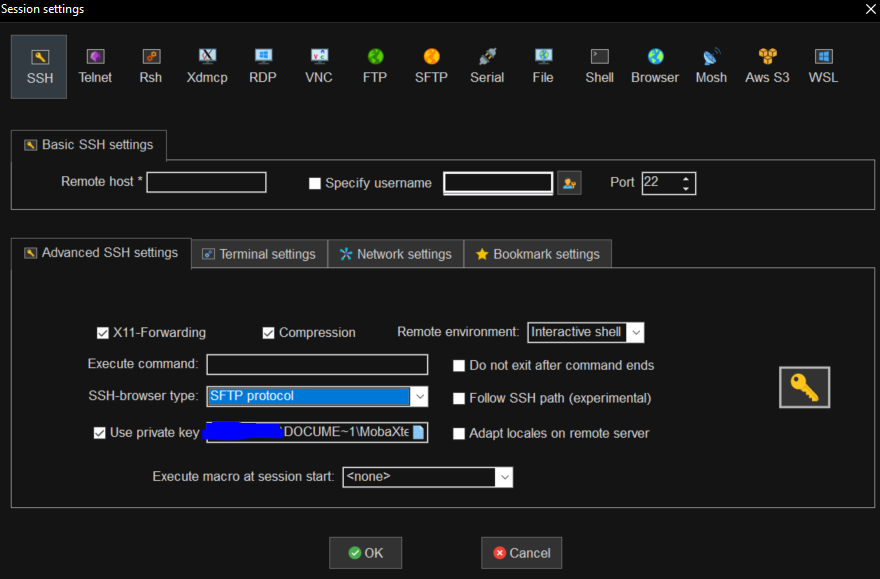
Once done you should be able to remotely log in to your server using an ssh client with ssh keys. In MobaXTerm you will need to set a private key in Advanced SSH settings:
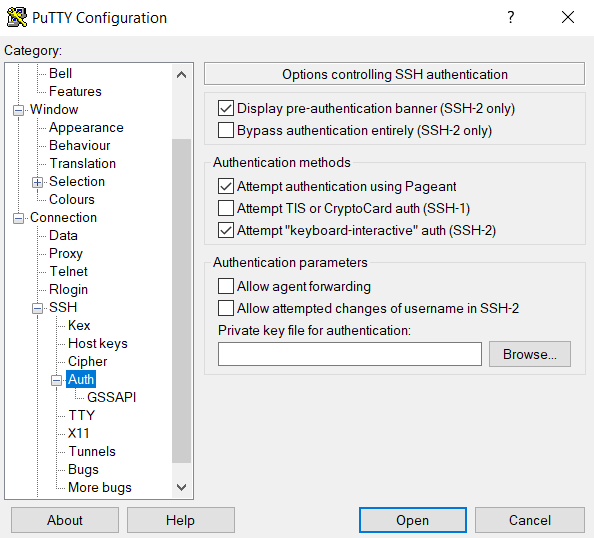
Putty requires you to SSH -> Auth and set a key there.
Once done try and connect, in MobaXterm you may need to close the application and reopen it to test this.
If you are using MobaXterm you can duplicate the session:
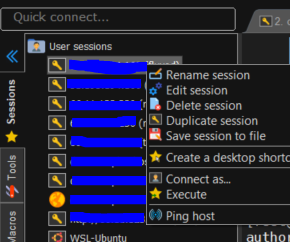
Which would allow you to do this without closing the other tabs.
Disabling password authentication
If ssh works without you using a password use vim to edit the ssh config file. However, note that you are
responsible for your own actions on your server, proceed with
caution. This step is entirely optional and is just an added security feature to preventing brute force attacks but ssh keys will work without this step.
Step 3
sudo vi /etc/ssh/sshd_config
Vim keeps the file permissions intact and generally looks better. Find the line that says
Step 4
PasswordAuthentication yes
Press the letter i, it will allow you to edit the file. Change the yes to a no.
Press ESC, then type in :x to save the changes.
Then to restart ssh do:
Step 5
sudo systemctl restart sshd
Try and duplicate the session again and try to log in. You will not be able to use your password anymore to access the server.

If you get this, you have broken something and you should try and fix the process.
If you can log in to your server, try closing your ssh client and trying again to verify the process works correctly. Once working, you have successfully secured your server.